Menu Home About Tutorials Style Shop Buttons

Saturday, October 30, 2010

Happy Halloween from Rosie the Riveter!

This year for Halloween I dressed up as the Rosie the Riveter "We Can Do It" poster. I am so excited about this costume!
It was simple, cheap, and partially homemade (we made the poster and Mom made the bandana) but I feel that it is the most creative costume I have ever had!

We added this jack-o-lantern face to our orange wall for our Halloween party and took fun pictures in front of it.

The poster is made to strap to my back so I can take it off when needed.


My husband dressed as a Spanish conquistador.


Happy Halloween!


Friday, October 29, 2010

Pumpkin Bracelet

I hope everyone is having a great Halloween season! I have been busy with parties and projects. I cannot wait to show you my costume!!! Yesterday I shared some ideas for pumpkin decorating if you missed it. Today I have another blogger's tutorial to show off.

Have you seen the tutorial for these darling candy pumpkin bracelets over at Brown Paper Packages? I loved this idea! I used it for the Halloween project in my crafts class at school. Below are some of the bracelets that the students made.


Thanks Kierste for this fun tutorial! The girls loved it!
BTW, I have another shirt refashion coming pretty soon!! It's FINALLY almost done!

Thursday, October 28, 2010

Pumpkin Decorating Ideas

All of these fantastic pumpkins were made by young teenagers. They did all the work themselves using a few provided materials or what they brought to school from home. They are so talented and creative!
This pumpkin has been painted white, then she made this beautiful design with pink, black, and grey paint.

Painted black for day time use, and his favorite logo carved in for nighttime use.


Cute stripes with jewels on top.


Halloween ribbons and other embellishments attached.


A white pumpking painted black and red. When it is carved you can see the white inside.


An orange pumpkin painted with black to look marbled.


Painted different colors and then she used a handmade stencil to paint on the words.


These monster eyes were made from colored paper and attached with paper clips. She wanted to use pipe cleaners but forget them at home. What creativity to use what she had!


Spray painted black with Halloween colored designs. Tied with a bunch of really cute Halloween ribbons.
I love creating with kids! Be sure to check out the linky parties!

Wednesday, October 20, 2010

Halloween Necklace

I made this necklace for mom as per her request (aka she is the designer). When I was finished I realized that I should have taken pictures and written a tutorial. However, if you have basic jewelry making skills you should be able to create one if you desire.
Connect the large black and orange beads together with eye pins. Attach them to the desired length of chain. Stack the small orange and black beads on head pins and attach them to the loops between the big black and orange beads. Attach a clasp on the end you have a cute, fun Halloween necklace! I love how the dangles look like spider legs!

Happy Halloween!


What I Wore

I still want to participate in "What I Wore" Wednesday but rather than just list where my clothes came from and what they cost, I would like to write about the creativity behind my outfits and what inspired me to wear something, combine two pieces, etc.


I hope that's not too cheesy, but I love to read fashion blogs where I can gain inspiration and outfit ideas. I really feel that clothes are a way that I can create every single day, even if I don't have time for crafts, photography, or music. I can still be creative and express myself.


This outfit was inspired by those amazing, rockin' shoes! I picked those babies up at the thrift store for $4 last week. They are pointy toed, beaded, sequined heels. They remind me of the shoes worn by Drew Barrymore in my favorite movie Ever After and I just HAD to have them! I also just made the belt and wanted to wear both things at the same time. But how to do it?


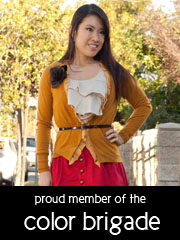
I chose to wear this blue tank top because it has a few sequins at the neckline to coordinate with the shoes. I have had it FOREVER and finally wore it again- hooray! I paired it with my new favorite sweater. It was the perfect outfit to match my belt (this one is mine, but you can purchase your own from my shop).


I just love this outfit! My mom made me this skirt several years ago and I wore it with green until I made this gorgeous purple shirt that matched perfectly. I wore this outfit last winter, but with my new found belt obsession, it just feels complete. (I hope my belt wasn't crooked like that all day!)


My husband and I were going on a Halloween boat ride on a local river and I needed something toasty warm to wear. A scarf is the perfect thing so I matched this outfit to the scarf I chose. A plain tee is the perfect background for the scarf, and the gray boots match nicely.


It looked great with my new coat too! I added a beanie and some gloves and was perfect!


Another example of my belt obsession. If a belt is too big to fit up high on your waist, use an eyelet punch from your craft supplies to make another hole.


This outfit may not seem like much to you, but it is the result of some serious remixing. I have had the green sweater (a hand-me-down) for some time and have worn it with jeans, black pants, and gray pants. I have tried black shirts and white shirts under it. New to my wardrobe this season are the gray sweater and little green belt so I added them. I love the layered look for fall and again with the belt obsession!


Thanks for reading! I would appreciate any comments and feedback you have on the quality and content of this post!

Monday, October 18, 2010

Halloween Jar Lanterns


I finally got around to doing a Halloween craft! My mom found the idea for these cute jars in the Taste of Home magazine. They are candle holders- like jack-o-lanterns but they will last longer!


To make your own keep on reading!

Supplies:

Variety of jars

Tissue paper

Mod Podge

Any other embellishments you wish to use.


My mom did all the work of gathering and washing our jars.


My mom bought orange, black, green, purple, and white tissue paper. I also used a little red and I thought yellow would be cute to make a moon and stars.


Cut your tissue paper to be a little bigger than the size of the jar. You need some to tuck inside the opening and some to flatten to the bottom.


Cover your jar with a light coat of Mod Podge.


Quickly cover the jar with your tissue paper. Make sure you tuck it inside the jar.


Decorate the jar as desired using more Mod Podge. A PDF of the jack-o-lantern faces can be downloaded at http://www.tasteofhome.com/lantern


Put another coat of Mod Podge over the entire jar.

Cute, right? Be careful with the ink from the faces. If you put more than a VERY light coat of Mod Podge on the faces they will smear. If this does happen, wash the jar in the sink and the tissue paper will dissolve and you can easily wash the jar clean.

Here is a photo of the bottom of the jar so you can see how to fold the tissue over.


For the striped jars, we cut strips of tissue paper using a paper cutter and attached them individually to the jars.


For the spider jar (see below for finished product) I cut a spider body and 8 legs from black tissue paper and attached to the jar. After I took this picture I added a red hour glass to make a black widow.


These are the jars my mom made. She did mostly faces and I love how they turned out. She has since bought several cute Halloween ribbons and tied the jars with ribbon.


These are the jars that I made. The one furthest to the right is supposed to be a candy corn.

Now, add a tea light candle and voila! a cute Halloween lantern. My mom and I are both having Halloween parties and will be putting our jars on our food tables for added decorations.

Thank you Taste of Home for the idea!

Speaking of Halloween....

I am going to take this opportunity to make a shameless plug for my cute Halloween headbands available in my Etsy shop. If you order this week, I will make it a priority to ship ASAP (within one or two business days) so you can wear it the week of Halloween. If you aren't a fan of the lace, you can order it without that embellishment.
Click here to purchase!


Linking up to these parties. Please check them out!

Friday, October 15, 2010

Orozko {New Etsy Shop}


I would like to introduce you to one of the newest Etsy accessory shops run by my good friend Amber... Orozko.

As you can see above, she is selling really cute Halloween accessories. These darling pins are called "Halloween Heroes." This is such a great thing for Mom to wear while taking the kids trick-or treating.

Orozko is also selling many other cute Halloween headbands, like the Black Rose Halloween headband pictured below. But hurry and order, Halloween is almost here!


Military is such a big trend this fall. This Emerald Tapestry headband is a great way to add that trend to your wardrobe in an affordable way. Orozko sells quite a few animal print headbands too, which is also a big trend this fall.

Orozko sells flower clips in very unique fabrics such as this Autumn Passion clip.

The last thing I would like to show you is the unique Brazilian Pride headband. This would be the perfect Christmas gift for someone who is from or has lived in Brazil.

Go show some love for this new Etsy shop. Check out Orozko now!

Friday, October 8, 2010

New Blog Buttons

Have you noticed that I have a new tab at the top? The one that says "Grab a Button!"? My sister-in-law was kind enough to make these super cute buttons for me. If you are a button collector, grab a button for your blog!


blog 50 dpi


jewelry 50 dpi


I also have a "featured on Yellow Blackbird" button so that I can start doing features of bloggers and projects.
A big thanks to Carlie!!!!

Fall Bridal Portraits

Fall is such a beautiful time of year. I am passionate about the cool weather and vibrant colors. It is a great time to take portraits, including bridal pictures. These are a few of the portraits I took of my friend last year in the canyon. The leaves make such a great background. I especially love the first few photos with the yellow leaves behind her.


I hope you are taking advantage of the beautiful colors of fall!
 

©2011 All Rights Reserved | Website Designed by Website Design Credit

Powered by Blogger